How to deploy your own Elixir Cross Referencer
The Elixir Cross Referencer is a great tool to index C/C++ source code, and it provides a web interface to view, search, and do symbol jumps. The official Elixir already supported a large group of projects like Linux, U-Boot, and Zephyr, but it may not support what you need, like FreeBSD.
This guide will show you how to deploy your Elixir Cross Referencer and set it up with FreeBSD kernel code.
Read more: How to deploy your own Elixir Cross ReferencerThis guide is based on Ubuntu 22.04 and does not use Docker to deploy the Elixir instance.
Table of content
- Install Elixir Cross Referencer
- Download FreeBSD source code and add Elixir support
- Index FreeBSD source code
- Set up Apache2 web server
- Maintaining Elixir
Install Elixir Cross Referencer
The installation process is pretty much the same as the official GitHub instructions. Hence I’m using Linux Containers to run Elixir, My default user is root.
# dependencies and prerequisites
apt install python3-jinja2 python3-bsddb3 python3-falcon python3-pytest python3-pygments universal-ctags perl git apache2 libapache2-mod-wsgi-py3 libjansson4
# elixir will be installed to /usr/local/elixir/
git clone https://github.com/bootlin/elixir.git /usr/local/elixir/Download FreeBSD source code and add Elixir support
I’m using “/opt/elixir-data/” as my Elixir project directory.
# make elixir index cache directory for freebsd
mkdir -p /opt/elixir-data/freebsd/data
# get freebsd source code
git clone https://github.com/freebsd/freebsd-src.git /opt/elixir-data/freebsd/repo
# (!!Important!!) change repo directory's owner to www-data user, or you'll get "This file does not exist" error on elixir web interface.
chown -R www-data /opt/elixir-data/freebsd/repo
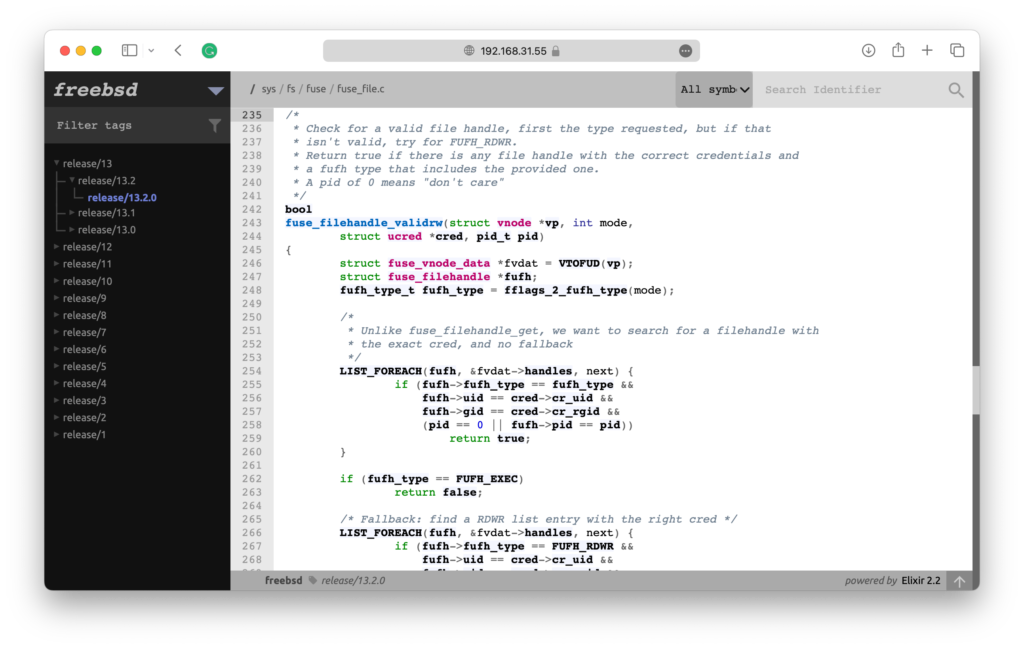
Adding Elixir support of FreeBSD is to let the Elixir web interface show project versions correctly. On the left panel of the Elixir web interface, version hierarchy is shown to let you quickly switch between project versions. Like in this picture “v6 / v6.5 / v6.5.5“
By default, Elixir uses a “vX.X.XXX” pattern to show version hierarchy. If the Git tags of a repository do not follow this pattern, then you need to support this repository. Otherwise, you’ll get a “FIXME” version on the web interface.
The support of a repository is done by creating a shell script and re-implementing some shell functions. The shell script should be placed inside “/usr/local/elixir/projects” directory and should be named as “<project name>.sh“. When accessing the Elixir web interface, some functions in this shell script are called to get the latest version and version hierarchy shown in the left panel.
In this case, we will create the file “freebsd.sh“, inside the “/usr/local/elixir/projects/” directory. The content of the file is:
# Elixir definitions for FreeBSD
# Enable DT bindings compatible strings support
dts_comp_support=1
list_tags()
{
echo "$tags"
}
list_tags_h()
{
echo "$tags" | tac | sed -E 's/(release\/[0-9]+)(\.[0-9]+)?(\.[0-9a-zA-Z_]+)?/\1 \1\2 \1\2\3/'
}
get_latest()
{
git tag | sort -V | tail -n 1
}Let me explain the file.
- The
dts_comp_support=1variable enables Device Tree support of Elixir. - The
list_tags()function filters Git tags. You have the$tagsvariable that contains all Git tags. You need to filter these tags, remove the ones you don’t want to show on the web interface and print the remaining ones tostdout. - The
list_tags_h()function split Git tags into 3-parted string, to show version hierarchy. For example, FreeBSD has the version tag “release/13.2.0“, you need to split it into this string
“release/13release/13.2release/13.2.0“
and print it tostdout. - The
get_latest()function gets the latest version of the repository. It is used by
“https://<elixir>/<repository>/latest/source“
URL. When this URL is requested, theget_latest()function is called to get the latest version. If the function is not implemented, you will get a 404 error.
Index FreeBSD source code
To use the web interface to search symbols, and jump between definition and implementation, you need to index the code first.
Before we index the source code, let’s check if the project is configured correctly. First, we check if we can get versions correctly.
root@elixir:~# cd /usr/local/elixir
root@elixir:/usr/local/elixir# LXR_REPO_DIR=/opt/elixir-data/freebsd/repo/ LXR_DATA_DIR=/opt/elixir-data/freebsd/data/ ./script.sh list-tags
release/1.0.0_cvs
release/1.1.0_cvs
release/1.1.5.1_cvs
release/2.0
release/2.0.5
release/2.0.5_cvs
release/2.0_cvs
release/2.1.0
...Seems OK. Then we check if we can get the version hierarchy correctly.
root@elixir:/usr/local/elixir# LXR_REPO_DIR=/opt/elixir-data/freebsd/repo/ LXR_DATA_DIR=/opt/elixir-data/freebsd/data/ ./script.sh list-tags -h
release/13 release/13.2 release/13.2.0
release/13 release/13.1 release/13.1.0
release/13 release/13.0 release/13.0.0
release/12 release/12.4 release/12.4.0
release/12 release/12.3 release/12.3.0
release/12 release/12.2 release/12.2.0
release/12 release/12.1 release/12.1.0
release/12 release/12.0 release/12.0.0
...Also, seems OK. Now, we index the code. I have a pretty powerful machine, so I configured it to index the code by using 16 threads.
root@elixir:/usr/local/elixir# LXR_REPO_DIR=/opt/elixir-data/freebsd/repo/ LXR_DATA_DIR=/opt/elixir-data/freebsd/data/ ./update.py 16Indexing big projects like FreeBSD can take a huge amount of time. In my case, It took almost 20 hours to complete. When it’s complete, we can test by making a query by command line:
root@elixir:/usr/local/elixir# LXR_REPO_DIR=/opt/elixir-data/freebsd/repo/ LXR_DATA_DIR=/opt/elixir-data/freebsd/data/ ./query.py release/13.2.0 ident fuse_filehandle_open C
Symbol Definitions:
Symbol in path: sys/fs/fuse/fuse_file.h, line: 216 , type: prototype
Symbol in path: sys/fs/fuse/fuse_file.c, line: 124 , type: function
Symbol References:
Symbol in path: sys/fs/fuse/fuse_vnops.c, line: 1763,1860,1942,2478
Documented in:All seems good.
Set up Apache2 web server
How to set up Apache2 web server, and configure SSL is not what this article is focused on. So I will provide my Apache2 configuration file here.
HttpProtocolOptions Unsafe
# Required for HTTP
<Directory /usr/local/elixir/http/>
Options +ExecCGI
AllowOverride None
Require all granted
SetEnv PYTHONIOENCODING utf-8
SetEnv LXR_PROJ_DIR /opt/elixir-data
</Directory>
# Required for the REST API
<Directory /usr/local/elixir/api/>
SetHandler wsgi-script
Require all granted
SetEnv PYTHONIOENCODING utf-8
SetEnv LXR_PROJ_DIR /opt/elixir-data
</Directory>
AddHandler cgi-script .py
<IfModule mod_ssl.c>
<VirtualHost *:443>
ServerAdmin mail@example.com
DocumentRoot /usr/local/elixir/http
ErrorLog ${APACHE_LOG_DIR}/error.log
CustomLog ${APACHE_LOG_DIR}/access.log combined
AllowEncodedSlashes On
RewriteEngine on
RewriteRule "^/$" "/freebsd/latest/source" [R]
RewriteRule "^/(?!api|acp).*/(source|ident|search)" "/web.py" [PT]
RewriteRule "^/acp" "/autocomplete.py" [PT]
ServerName elixir.example.com
SSLCertificateFile /etc/letsencrypt/live/elixir.example.com/fullchain.pem
SSLCertificateKeyFile /etc/letsencrypt/live/elixir.example.com/privkey.pem
Include /etc/letsencrypt/options-ssl-apache.conf
</VirtualHost>
</IfModule>Remember to replace the domain name with yours.
Maintaining Elixir
There’s not much thing to do to maintain Elixir. You can set up a cron job to pull the code repository and Elixir itself.
If you need to remove the Elixir top banner, simply empty this file:/usr/local/elixir/templates/header.html
I wrote two shell scripts to facilitate Elixir project creation and index updating. The code is on my GitHub.