阅读视图

发现新文章,点击刷新页面。
🔲 ☆

为 OnlyOffice 设置密钥(JWT令牌)

搭建好 OnlyOffice 后因为服务是公开的,所以任何人都可以链接使用,就给内存本不就富裕的 VPS 更大的压力。所以我们需要给 OnlyOffice 设置好密钥(JWT令牌),只给自己允许的人进行使用。


操作

一、将 Docker 容器中的 default.json 文件拷贝出,命令:

1
sudo docker cp 容器ID:/etc/onlyoffice/documentserver/local.json 拷贝出的文件目的目录

img将文件拷贝至目标目录

二、使用文本编辑框打开文件,如图所示两处位置修改为密钥

img

三、将如图三处位置改成 True

四、然后将 Docker 容器中的 default.json 文件拷贝回去,命令:

1
sudo docker cp 文件所在目录/local.json  容器ID:/etc/onlyoffice/documentserver/

img

五、重启容器即可

提示

如未在 NextCloud 的 OnlyOffice 插件中设置密钥,即会提示 “文档安全令牌未正确形成”

img

在 NextCloud 的 OnlyOffice 插件中设置正确的密钥

img

设置完成保存后即可正常使用。

img

🔲 ☆

使用NGINX的auth_request进行统一jwt鉴权

NGINX的auth_request模块提供了一种统一的认证机制,可以在NGINX层面进行JWT鉴权,而不需要在每个后端服务中重复实现认证逻辑。

首先我们定义一下nginx的配置,它的配置如下

flat
1
2
3
4
5
6
7
8
9
10
11
12
13
14
15
16
17
18
19
20
21
22
23
24
25
26
27
28
29
30
31
32
33
34
35
36
37
38
server {
listen 8965;

# 鉴权接口,仅供 Nginx 内部 auth_request 使用
location = /auth {
internal; # 该接口只能被 Nginx 内部请求,防止外部访问
# 转发到实际的认证服务
proxy_pass http://localhost:5001/api/auth/verify;
# 不转发请求体,提升效率
proxy_pass_request_body off;
# 防止后端因 Content-Length 不确定而报错
proxy_set_header Content-Length "";
# 将客户端传来的 Authorization 头(JWT Token)传给认证服务
proxy_set_header Authorization $http_authorization;
# 传入原始请求路径,供认证服务判断路径是否需要鉴权
proxy_set_header X-Original-URI $request_uri;
}

# 所有 / 路径下的请求都进行认证
location / {
# 认证请求会先调用上面的 /auth 接口
auth_request /auth;
# 如果认证失败(如返回 401),跳转到自定义处理逻辑
error_page 401 = @unauthorized;
# 从 /auth 的响应头中提取用户信息
auth_request_set $user_id $upstream_http_x_user_id;
# 把用户信息注入到请求头中,转发给后端业务服务
proxy_set_header X-User-ID $user_id;
# 转发到后端服务
proxy_pass http://localhost:5001;
}

# 自定义未授权响应(认证失败时返回)
location @unauthorized {
# 返回 401 状态码 + 文本内容
return 401 "Unauthorized";
}
}

有了这个nginx的配置之后,我们就可以实现鉴权的逻辑了,具体逻辑如下

flat
1
2
3
4
5
6
7
8
9
10
11
12
13
14
15
16
17
18
19
20
21
22
23
24
25
26
27
28
29
30
31
32
33
34
35
36
37
38
39
40
41
42
43
44
45
46
47
48
49
50
51
import jwt
from flask import Flask, request, make_response, jsonify
from jwt import InvalidTokenError

app = Flask(__name__)

SECRET_KEY = "a-string-secret-at-least-256-bits-long"

# 路径白名单,不需要鉴权的接口
PUBLIC_PATHS = [
"/api/public/hello",
"/api/login",
"/api/register"
]


@app.route("/api/auth/verify", methods=["GET"])
def verify_token():
original_uri = request.headers.get("X-Original-URI", "")
# 不需要鉴权的接口,直接返回200
if original_uri in PUBLIC_PATHS:
return "", 200

# 否则继续验证 JWT
auth_header = request.headers.get("Authorization")
if not auth_header or not auth_header.startswith("Bearer "):
return "Missing or invalid Authorization header", 401

# 解析得到token
token = auth_header.split(" ", 1)[1]
try:
payload = jwt.decode(token, SECRET_KEY, algorithms=["HS256"])
response = make_response("", 200)
response.headers["X-User-ID"] = str(payload.get("user_id", ""))
return response
except InvalidTokenError:
return "Invalid token", 401


@app.route("/api/hello")
def hello():
return jsonify({"message": "hello from auth", "user_id": request.headers.get("X-User-ID")})


@app.route("/api/public/hello")
def ping():
return {"msg": "hello without auth"}


if __name__ == "__main__":
app.run(host="0.0.0.0", port=5001)

启动nginx和如上python服务,之后我们使用如下payload和header以及密钥生成token

payload

{    "alg": "HS256",    "typ": "JWT"}

header

{    "user_id": 656670838050885}

密钥

a-string-secret-at-least-256-bits-long

生成得到token

eyJhbGciOiJIUzI1NiIsInR5cCI6IkpXVCJ9.eyJ1c2VyX2lkIjo2NTY2NzA4MzgwNTA4ODV9.caQ6cp-BA-OMxXu4zTUjV0OiZo1iygvdi7GPQNjNVHM

之后我们就可以使用token进行测试了,具体测试结果如下

~ AUTH_HEADER="Authorization: Bearer eyJhbGciOiJIUzI1NiIsInR5cCI6IkpXVCJ9.eyJ1c2VyX2lkIjo2NTY2NzA4MzgwNTA4ODV9.caQ6cp-BA-OMxXu4zTUjV0OiZo1iygvdi7GPQNjNVHM"~ curl -H "$AUTH_HEADER" http://localhost:8965/api/hello{"message":"hello from auth","user_id":"656670838050885"}~ curl -H "$AUTH_HEADER" http://localhost:8965/api/public/hello{"msg":"hello without auth"}~ curl -H "$AUTH_HEADER" http://localhost:8965/api/login<!doctype html><html lang=en><title>404 Not Found</title><h1>Not Found</h1><p>The requested URL was not found on the server. If you entered the URL manually please check your spelling and try again.</p>~ curl http://localhost:8965/api/public/hello{"msg":"hello without auth"}~ curl http://localhost:8965/api/helloUnauthorized%

如上我们正确设置了Authorization之后就可以正常访问需要鉴权的接口了,但是去掉了Authorization之后需要鉴权的接口就会返回Unauthorized。此外还可以看到,不需要鉴权的接口,即使不添加鉴权配置也是可以正常访问的。

🔲 ⭐

使用APISIX解析jwt并获取payload信息

APISIX支持获取jwt的信息,并且将这个信息进行解码并转发给后端服务。

1. 启动服务

首先我们根据官方脚本来启动APISIX服务

~ curl -sL "https://run.api7.ai/apisix/quickstart" | shDestroying existing apisix-quickstart container, if any.Installing APISIX with the quickstart options.Creating bridge network apisix-quickstart-net.77e35df073894075ad77facd9d1c7d2a35b280213732c1b631052caede079bab✔ network apisix-quickstart-net createdStarting the container etcd-quickstart.d123605c8b7658b130be97e5f44e7a160aa85858db008032ecf594266225e342✔ etcd is listening on etcd-quickstart:2379Starting the container apisix-quickstart.38434806c63b3a72f53fb6ad849cb4c11781eebaff79c8db04510226593fcf46⚠ WARNING: The Admin API key is currently disabled. You should turn on admin_key_required and set a strong Admin API key in production for security.✔ APISIX is ready!

2. 配置插件

启动了APISIX之后,我们首先创建一个插件配置。在这个插件中我们定义了一个Lua方法,这个方法的目的是从请求的header中获取authorization信息,并进行解码,之后将解码的信息放到HTTP header中传给后端

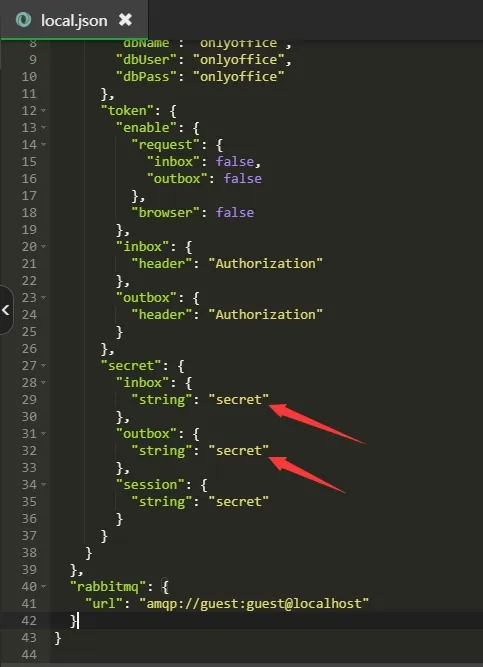
curl --location --request PUT 'http://127.0.0.1:9180/apisix/admin/plugin_configs/1001' \--header 'Content-Type: application/json' \--header 'Accept: */*' \--header 'Host: 127.0.0.1:9180' \--header 'Connection: keep-alive' \--data-raw '{    "plugins": {        "serverless-pre-function": {            "phase": "access",            "functions": [                "return function(_, ctx) local core = require(\"apisix.core\") local jwt = require(\"resty.jwt\") local auth_header = ctx.var.http_authorization if not auth_header then return end local token = auth_header:match(\"Bearer%s+(.+)\") if not token then return end local obj = jwt:load_jwt(token) if obj and obj.valid and obj.payload then if obj.payload.user_id then core.request.set_header(\"X-User-Id\", obj.payload.user_id) end if obj.payload.role then core.request.set_header(\"X-User-Role\", obj.payload.role) end end end"            ]        }    }}'

如上的fucntions属性中添加了一个Lua方法,格式化之后的Lua代码如下

1
2
3
4
5
6
7
8
9
10
11
12
13
14
15
16
17
18
19
20
21
22
23
24
return function(_, ctx)
local core = require("apisix.core")
local jwt = require("resty.jwt")

local auth_header = ctx.var.http_authorization
if not auth_header then
return
end

local token = auth_header:match("Bearer%s+(.+)")
if not token then
return
end

local obj = jwt:load_jwt(token)
if obj and obj.valid and obj.payload then
if obj.payload.user_id then
core.request.set_header("X-User-Id", obj.payload.user_id)
end
if obj.payload.role then
core.request.set_header("X-User-Role", obj.payload.role)
end
end
end

这段代码实现了如下几个功能:

  1. 从 Authorization: Bearer 中提取 JWT
  2. 使用 resty.jwt 解码
  3. 如果合法,提取 user_id 和 role
  4. 注入到 header(X-User-Id, X-User-Role)中供后端读取

3. 配置consumer

创建了这个插件之后,我们再新建一个consumer。在APISIX中,consumer代表了一类客户端,比如APP。我们可以针对这类客户端添加一些配置,多种不同类型的客户端(比如APP、网页、开放平台,等等)可以分别设置成不同的consumer以方便管理

curl --location --request PUT 'http://127.0.0.1:9180/apisix/admin/consumers/app' \--header 'Content-Type: application/json' \--header 'Accept: */*' \--header 'Host: 127.0.0.1:9180' \--header 'Connection: keep-alive' \--data-raw '{    "username": "app",    "plugins": {        "jwt-auth": {            "key": "app-key",            "secret": "a-string-secret-at-least-256-bits-long",            "algorithm": "HS256"        }    }}'

如上添加了一个名为app的consumer,它的key是app-key,加密方式是HS256,密钥是a-string-secret-at-least-256-bits-long。有了解析插件和consumer之后,我们就可以创建路由了。

4. 配置路由

如下请求会创建一个ID为1的路由,使用了ID为1001插件,并且添加了jwt-auth的配置,路由的后端是https://httpbin.org,这个网站会把我们请求的信息返回给我们。

curl --location --request PUT 'http://127.0.0.1:9180/apisix/admin/routes/1' \--header 'Content-Type: application/json' \--header 'Accept: */*' \--header 'Host: 127.0.0.1:9180' \--header 'Connection: keep-alive' \--data-raw '{    "uri": "/headers",    "plugin_config_id": 1001,    "plugins": {        "jwt-auth": {}    },    "upstream": {        "type": "roundrobin",        "nodes": {            "httpbin.org:80": 1        }    }}'

5. 发起请求

在创建好了plugin_config、consumer和route之后,我们就可以测试请求了。首先我们构建如下payload

1
2
3
4
5
6
{
"key": "app-key",
"user_id": 100001,
"role": "admin",
"exp": 1900000000
}

这个payload包含了user_idrole两个业务属性,exp代表这个jwt的过期时间戳,key是APISIX用于识别匹配哪个consumer的,这里我们选择匹配app-key这个consumer。之后我们将该payload和密钥a-string-secret-at-least-256-bits-long一起在https://jwt.io/进行编码,得到编码jwt信息如下

eyJhbGciOiJIUzI1NiIsInR5cCI6IkpXVCJ9.eyJrZXkiOiJhcHAta2V5IiwidXNlcl9pZCI6MTAwMDAxLCJyb2xlIjoiYWRtaW4iLCJleHAiOjE5MDAwMDAwMDB9.qG7PNPz2XlatmjrhNW_xf6SmI8T9JSIx2lJVJcAox0I

之后我们执行HTTP请求,将这个jwt放到Authorization header中

curl --location --request GET 'http://127.0.0.1:9080/headers' \--header 'Authorization: Bearer eyJhbGciOiJIUzI1NiIsInR5cCI6IkpXVCJ9.eyJrZXkiOiJhcHAta2V5IiwidXNlcl9pZCI6MTAwMDAxLCJyb2xlIjoiYWRtaW4iLCJleHAiOjE5MDAwMDAwMDB9.qG7PNPz2XlatmjrhNW_xf6SmI8T9JSIx2lJVJcAox0I' \--header 'Accept: */*' \--header 'Host: httpbin.org:80' \--header 'Connection: keep-alive'

请求得到的响应如下,可以看到user_id和role属性已经成功的传给后端服务了

1
2
3
4
5
6
7
8
9
10
11
12
13
{
"headers": {
"Accept": "*/*",
"Authorization": "Bearer eyJhbGciOiJIUzI1NiIsInR5cCI6IkpXVCJ9.eyJrZXkiOiJhcHAta2V5IiwidXNlcl9pZCI6MTAwMDAxLCJyb2xlIjoiYWRtaW4iLCJleHAiOjE5MDAwMDAwMDB9.qG7PNPz2XlatmjrhNW_xf6SmI8T9JSIx2lJVJcAox0I",
"Host": "httpbin.org",
"User-Agent": "curl/7.81.0",
"X-Amzn-Trace-Id": "Root=1-68709903-309891501348175943af3223",
"X-Consumer-Username": "app",
"X-Forwarded-Host": "httpbin.org",
"X-User-Id": "100001",
"X-User-Role": "admin"
}
}
❌